Barbell Back Workout: How to Deadlift and Barbell Row
Why the Barbell Is the Best Tool for Back Training
The barbell deadlift and barbell row are the two exercises that have built more backs than every machine in the gym combined. The deadlift lets you pull the heaviest weight of any exercise, recruiting your entire posterior chain from traps to calves. The barbell row builds the horizontal pulling strength that the deadlift cannot — targeting the lats, rhomboids, and rear delts with heavy loads you simply cannot match on a cable machine.
A 2020 EMG analysis published in the Journal of Strength and Conditioning Research found that the conventional deadlift activates the erector spinae and latissimus dorsi at higher levels than any machine-based back exercise. The barbell row, when performed with a strict torso angle, produces greater mid-back activation than seated cable rows at equivalent loads — because your core must stabilize the entire movement, not just pull.
Why barbell over other tools for back training? The barbell allows the greatest load progression, the most natural grip options, and the simplest setup — a bar, some plates, and the floor. This guide breaks down both exercises step by step so you can build a back that is thick, wide, and strong.
How to Deadlift: Step-by-Step Form
The conventional deadlift targets the erector spinae, glutes, hamstrings, latissimus dorsi, and trapezius — making it the most complete posterior chain exercise you can do. It is the single best test and builder of raw pulling strength.
Step 1 — Setup and Stance
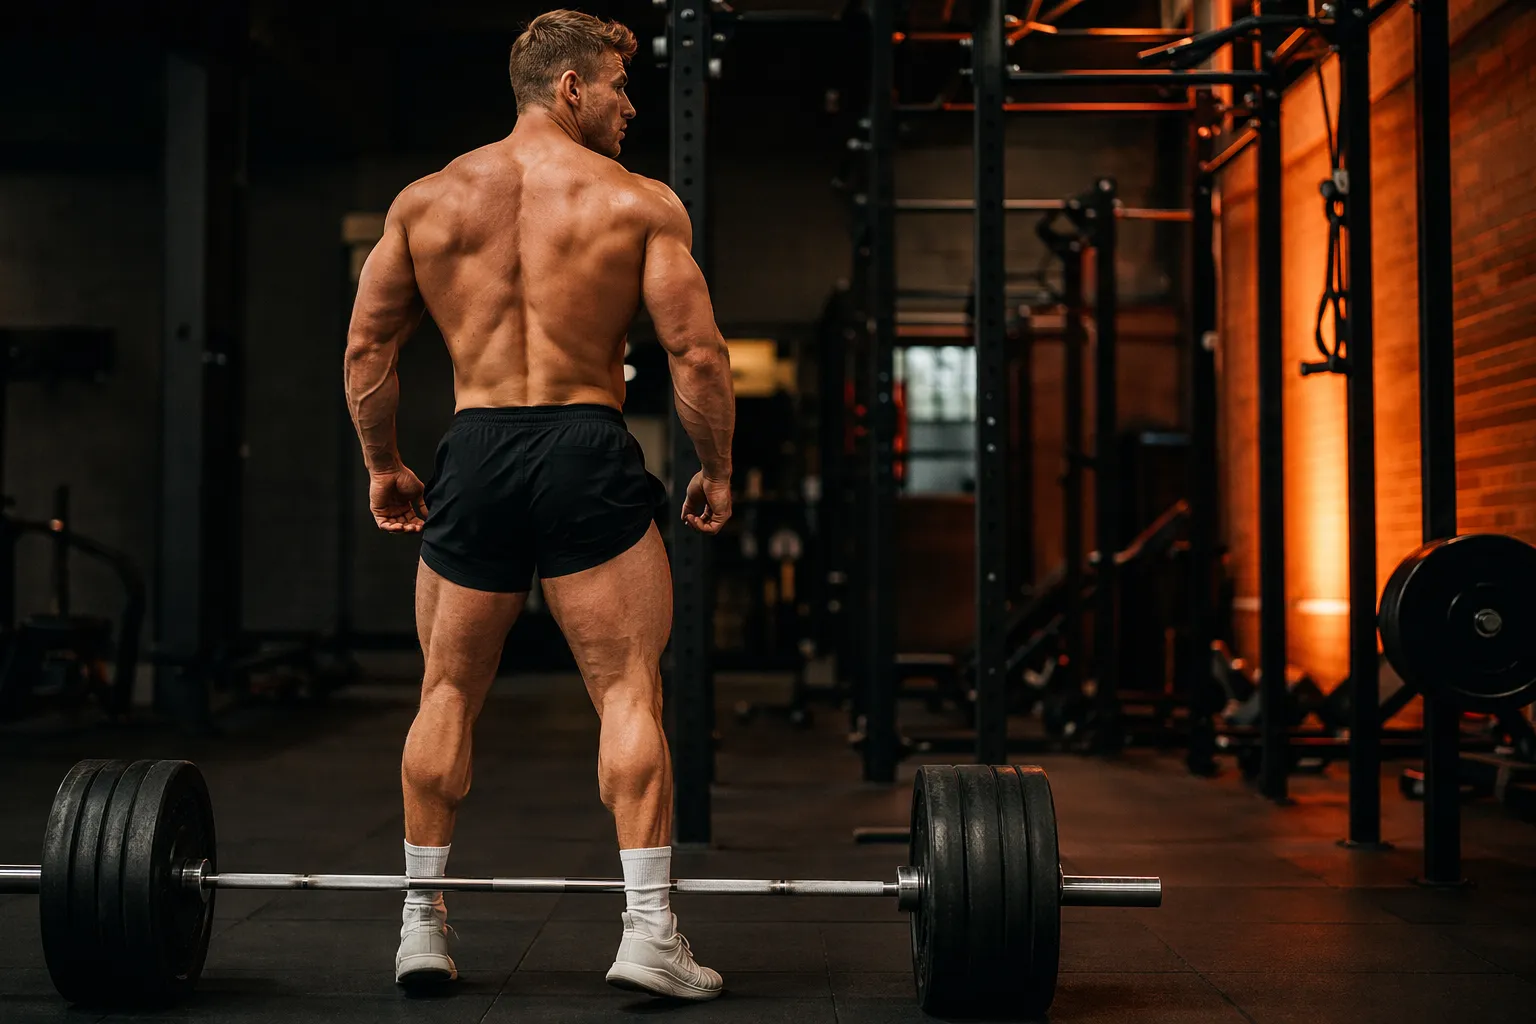
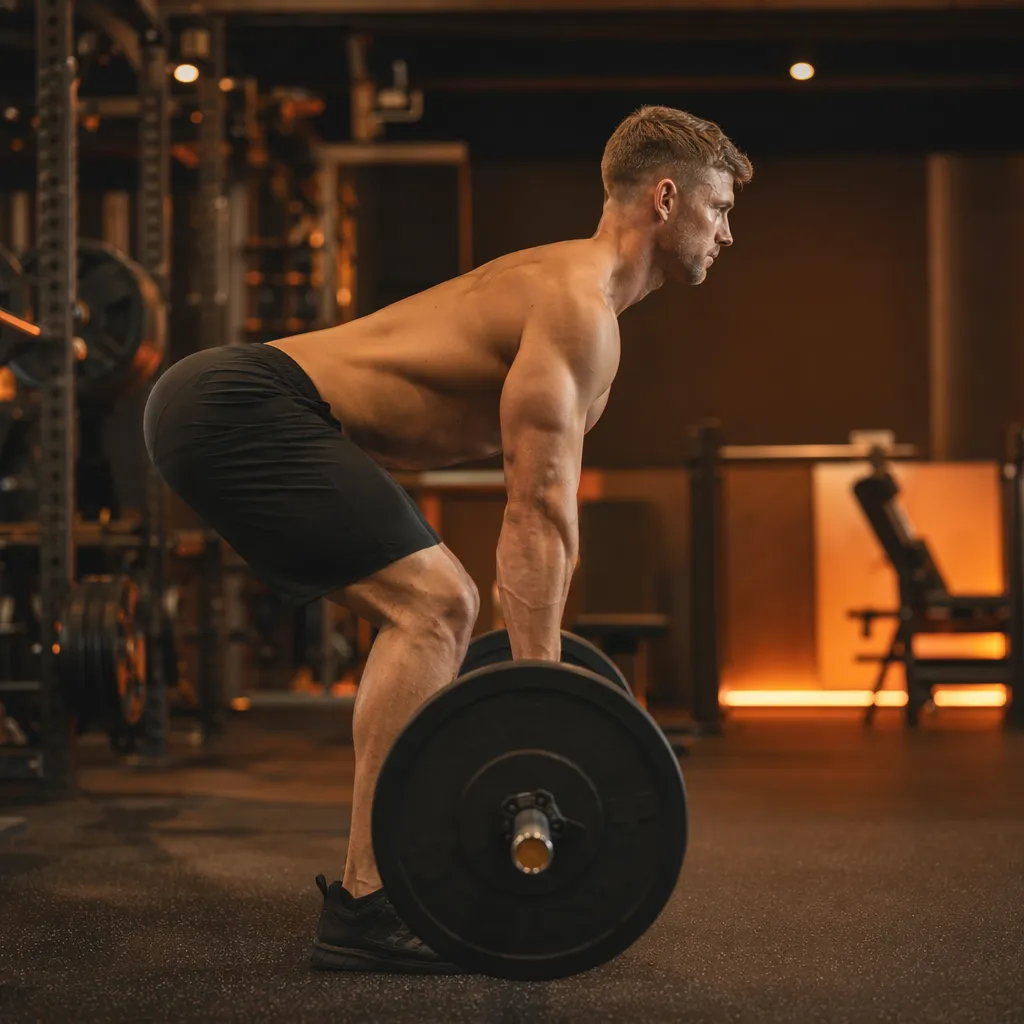
Stand with your feet hip-width apart, with the barbell over the middle of your feet (laces line). Your shins should be roughly 1–2 inches from the bar. Bend at the hips and grip the bar just outside your knees — use a double-overhand grip for lighter sets, or a mixed grip (one hand over, one under) when the weight gets heavy. Drop your hips until your shins touch the bar, then push your chest up and pull the slack out of the bar — your arms should be straight and under tension before the bar leaves the floor. Your back should be flat, not rounded and not hyperextended. Think "chest proud, lats tight."
Step 2 — Pull (Concentric)
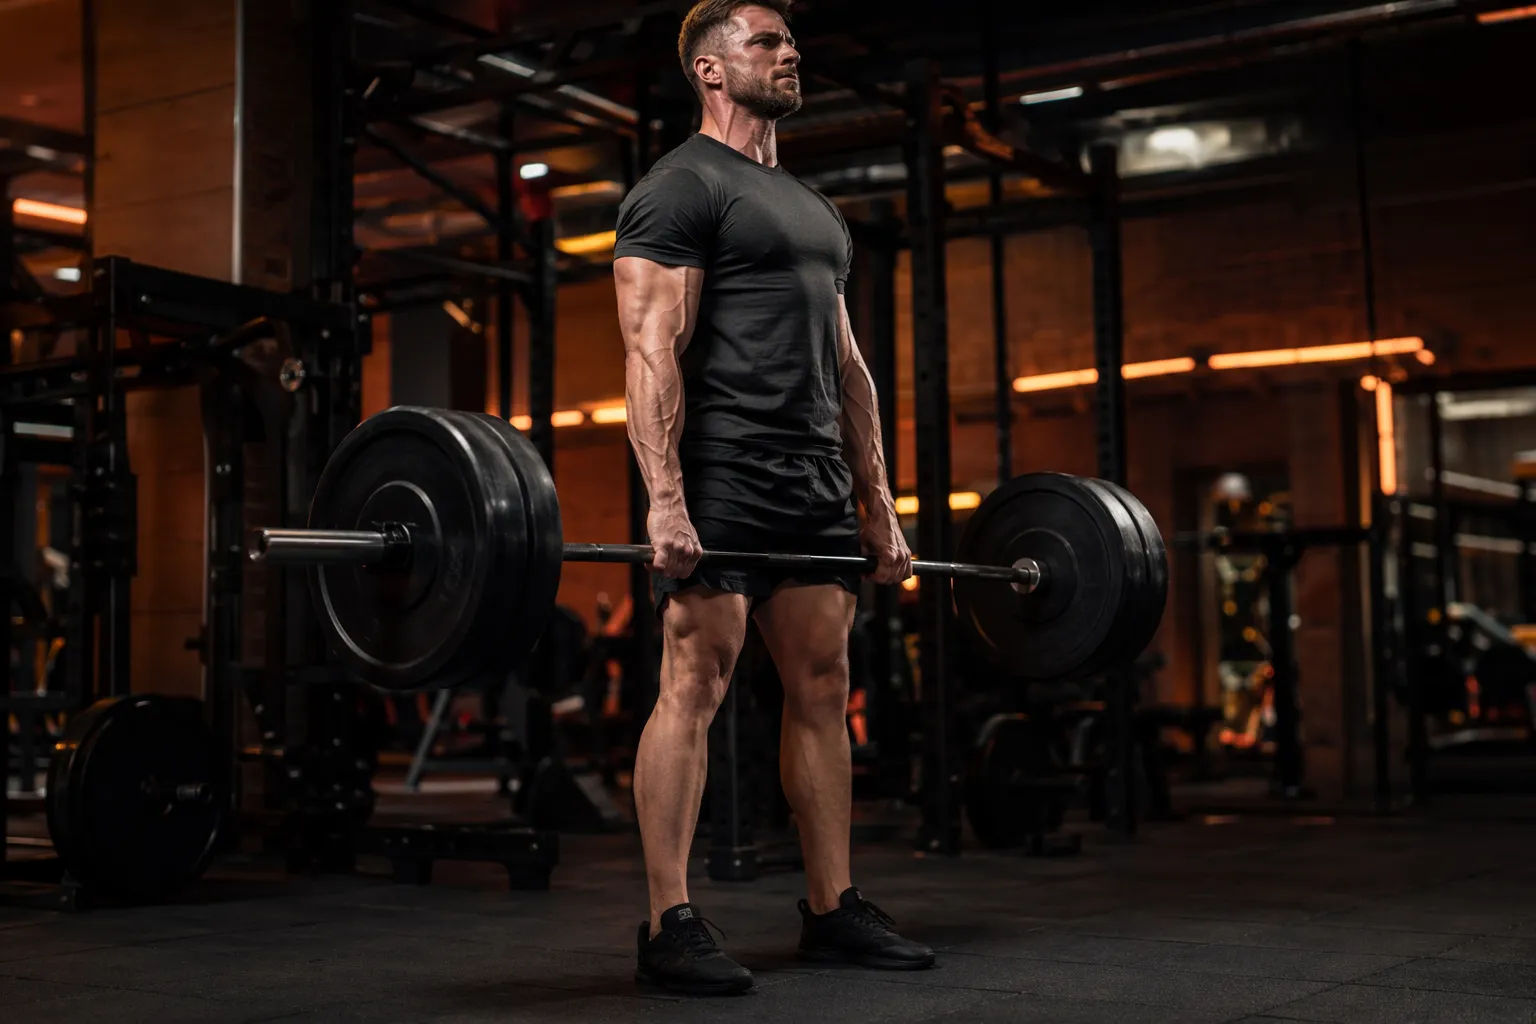
Drive your feet into the floor as if pushing the ground away — the bar should rise with your hips and shoulders together, not hips first. Keep the bar close to your body: it should graze your shins on the way up. The bar path is a near-vertical line. As the bar passes your knees, drive your hips forward to lock out. Do not lean back at the top — stand tall with your glutes squeezed and shoulders back. In my experience coaching lifters, the most common problem at this stage is the hips shooting up before the bar moves, which turns the deadlift into a stiff-leg variation and shifts all the load onto the lower back.
Step 3 — Lower (Eccentric)
Lower the bar by pushing your hips back first, then bending the knees once the bar clears them. Keep the bar close to your body on the way down just like the way up. Control the descent — do not drop the bar from lockout. A controlled eccentric builds more back strength and protects the lower back from the jarring impact of a free-falling barbell.
Step 4 — Breathing Pattern
Take a deep breath into your belly before each rep and brace your core hard — this is the Valsalva maneuver and it stabilizes your spine under heavy load. Hold your breath through the pull and exhale at lockout. Re-breathe and re-brace before every single rep. Never hold your breath across multiple reps — your blood pressure and intra-abdominal pressure need to reset.
Deadlift setup and grip position
Deadlift execution, bar at knee level
How to Do the Barbell Row with Proper Form

The barbell row targets the latissimus dorsi, rhomboids, middle and lower trapezius, and rear deltoids. It builds the thickness that deadlifts alone cannot — the mid-back musculature responsible for posture and upper-body pulling power. According to a 2019 study in the Journal of Sports Sciences, the barbell row produces significantly higher lat and rhomboid activation than the seated cable row at the same relative intensity, likely because the standing position demands full-body stabilization.
Step 1 — Setup and Hinge Position
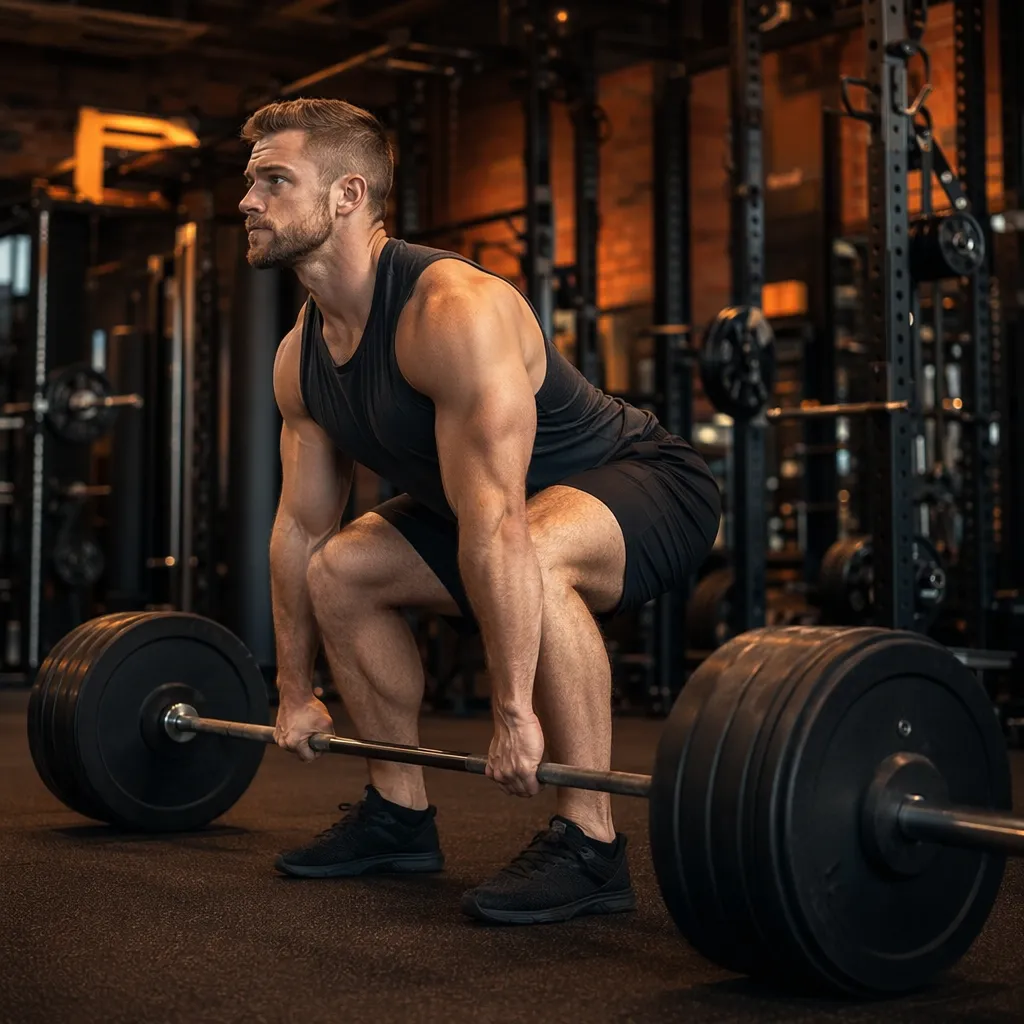
Stand with your feet shoulder-width apart and the bar over your mid-foot. Hinge forward at the hips until your torso is roughly 30–45° from horizontal — this is the critical angle that determines which muscles do the work. A more upright torso shifts emphasis to the traps and upper back; a more horizontal torso hits the lats and mid-back harder but demands more lower back strength. Bend your knees slightly and keep them "soft" — locked knees plus a heavy row is a recipe for hamstring strain. Let your arms hang straight down to the bar.
Step 2 — Grip
Grip the bar just outside your knees with a double-overhand (pronated) grip. This is the standard barbell row grip — it maximizes lat engagement and keeps the movement honest. An underhand (supinated) grip shifts some work to the biceps and lower lats, which is a valid variation but not the default. Wrap your thumbs around the bar fully. Before you row, pull your shoulder blades down and back — this sets your lats and mid-back under tension, preventing your biceps from dominating the movement.
Step 3 — Row to Lower Chest
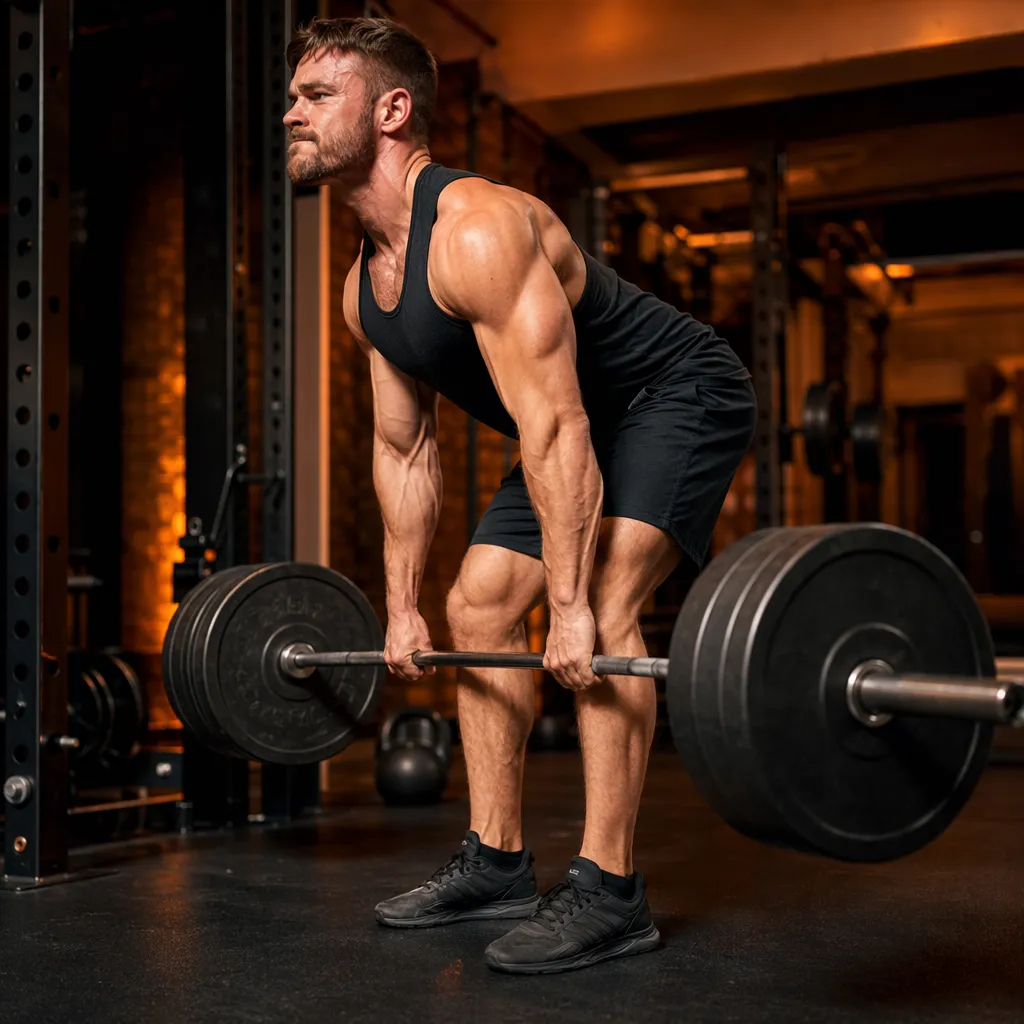
Pull the bar toward your lower chest or upper abdomen — not your neck, not your belly button. Think about driving your elbows back and squeezing your shoulder blades together at the top. The bar should travel in a straight line from arm's length to your torso. Keep your torso angle consistent — if your chest rises dramatically on each rep, you are using too much body English and turning the row into a partial deadlift.
Step 4 — Lower Under Control
Lower the bar back to arm's length with a 2–3 second eccentric. Do not let the bar free-fall — the controlled lowering is where much of the back growth happens, as the muscles work eccentrically to decelerate the load. Reset your torso position and scapular tension at the bottom of each rep if needed.
Barbell row setup and hinge position
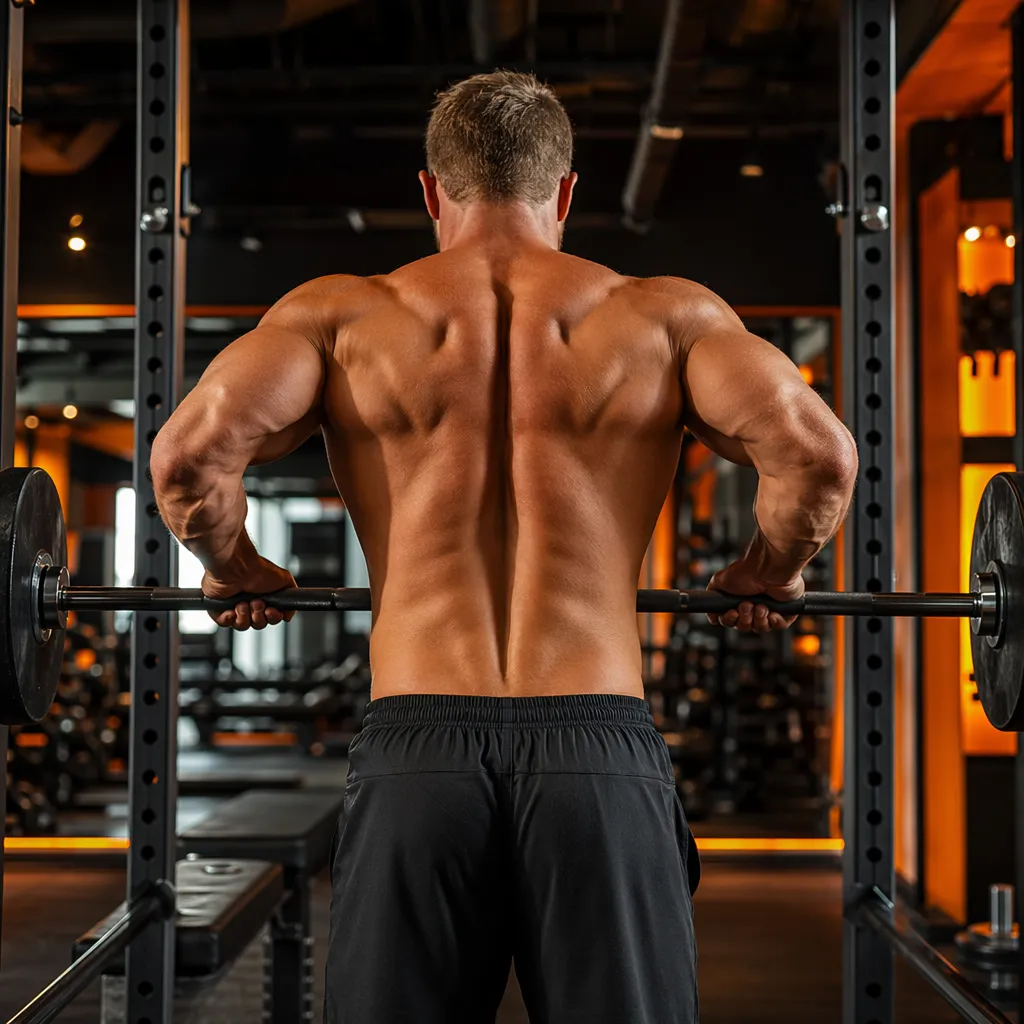
Barbell row execution, bar at lower chest
What Are the Most Common Deadlift and Barbell Row Mistakes
Fix these errors and your back will grow faster — with far fewer injuries.
Deadlift: Rounding the lower back: This is the number one deadlift mistake and the fastest path to a disc injury. If your lower back rounds under load, reduce the weight and focus on keeping your chest up and lats tight from setup through lockout. Hamstring flexibility and hip mobility work can help if tightness is forcing you into a rounded position.
Deadlift: Jerking the bar off the floor: Yanking the bar with relaxed arms and no tension before the pull creates a shock load through your spine. Always pull the slack out of the bar first — your arms should be straight and under tension, your lats engaged, and your core braced before the bar leaves the floor.
Barbell Row: Using too much body English: If your torso rises 20°+ on each rep, you are heaving the weight instead of rowing it. Reduce the load and maintain a consistent torso angle. A slight body movement is acceptable on heavy sets, but the back should do the majority of the work.
Barbell Row: Rowing to the neck: Pulling the bar to your upper chest or neck turns a lat-dominant movement into a rear delt and trap exercise. Aim for the lower chest or upper abdomen to keep the lats and rhomboids as the prime movers.
Both exercises: Skipping the warm-up sets: Jumping straight to your working weight with cold muscles and joints is asking for a pulled muscle or worse. Always do 2–3 progressively heavier warm-up sets before your working sets, even if you feel "ready."
What Are the Key Takeaways
| Point | Recommendation |
|---|---|
| Why barbell for back | Heaviest loads + full posterior chain = best back builder |
| Deadlift setup | Bar over mid-foot, hips dropped, chest proud, slack pulled |
| Deadlift bar path | Near-vertical, grazing shins and thighs on the way up |
| Barbell row torso angle | 30–45° from horizontal — consistent throughout each rep |
| Barbell row target | Pull to lower chest / upper abdomen, not the neck |
| Both exercises | Brace core with Valsalva, pull slack before lifting, warm up properly |
Quick mistake checklist:
- Lower back rounds on deadlift — reduce weight, focus on chest-up setup
- Jerking the bar off the floor — pull slack first, then drive
- Excessive body English on rows — lighten the load, lock the torso angle
- Rowing to the neck — aim for lower chest to target lats
- Skipping warm-up sets — always do 2–3 progressive warm-ups
Recommended back day combination: Barbell deadlift 4×5 + Barbell row 4×8 + Pull-ups 3×10 + Face pulls 3×15. This covers vertical and horizontal pulling with both heavy and moderate loads for complete back development. For a chest-focused alternative, see our barbell chest workout guide.
Frequently Asked Questions
How do I stop my lower back from rounding on deadlifts?
Before you pull, drop your hips until shins touch the bar, push your chest up, and pull the slack out. If your back still rounds, reduce the weight and work on hip mobility.
What is the correct torso angle for barbell rows?
Keep your torso at roughly 30-45 degrees from horizontal. More upright shifts work to the traps; more horizontal hits the lats harder but demands more lower back strength.
Should I pull the bar to my chest or stomach on barbell rows?
Pull toward your lower chest or upper abdomen. Rowing to your neck turns a lat exercise into a rear delt and trap movement.
What does pulling the slack out of the bar mean?
It means creating tension before the bar leaves the floor — arms straight and under load, lats engaged, core braced. This prevents a sudden jerk through your spine when you start the pull.