
Pull-up Bar Workout: Pull-ups, Chin-ups, and Beginner Progressions for Back & Biceps
Pull-up bar training builds the back and biceps. Grip the bar with hands slightly wider than your shoulders, hang with straight arms, and pull your chest toward the bar by driving your elbows down and back, squeezing your shoulder blades. Lower under control. If you cannot do a full pull-up, use bands or negatives to build up.
Why the Pull-up Bar Is the Gold Standard for Back & Biceps

The pull-up bar is the most effective single piece of equipment ever made for building a wide, thick, athletic back. Pull-ups and chin-ups force you to move your entire bodyweight against gravity through a full vertical pulling pattern — something no machine, cable, or barbell variation can fully replicate. Every other back exercise is a partial substitute for what the pull-up bar offers in one movement.
A 2014 EMG analysis published in the Journal of Strength and Conditioning Research compared pull-up grip variations and found that the wide-grip pull-up produced peak latissimus dorsi activation, while the close-grip chin-up maximized biceps brachii recruitment. Together, they cover both heads of the visual back-and-arms development that lifters chase. A 2018 study in the same journal found that lifters who could perform 10+ bodyweight pull-ups showed significantly greater lat thickness on ultrasound than equally strong lifters who relied on lat pulldowns.
Why the pull-up bar over a cable lat pulldown? Three reasons. First, you must stabilize your entire bodyweight, which recruits the core, rhomboids, and grip far more than a seated machine. Second, the bar is honest — you cannot cheat reps by leaning back or using momentum the way you can with a cable. Third, pull-ups scale forever: when bodyweight gets easy, you add a weight belt, and the progression continues. This guide breaks down both pull-ups and chin-ups, plus a clear progression for lifters who cannot do a pull-up yet.
Pull-up vs Chin-up: What's the Difference?

People use the terms interchangeably, but they are different exercises with different primary movers.
Pull-up (overhand / pronated grip): Palms face away from you. The shoulders are in external rotation, which puts the latissimus dorsi in its strongest mechanical position. The biceps assist but cannot dominate because the supinator action of the forearm is locked out. Pull-ups are the harder of the two and the better choice for pure back development.
Chin-up (underhand / supinated grip): Palms face toward you. The shoulders are in internal rotation, which shortens the biceps and gives them a much stronger pull. Chin-ups recruit the biceps brachii at peak intensity (close to 100% of MVC in EMG studies), while still hitting the lats hard. Most lifters can do 2-3 more chin-ups than pull-ups at the same bodyweight.
Neutral grip (palms facing each other): Sits between the two. Easier on the shoulders and elbows than the wide overhand grip, and great for high-volume work without joint stress. Recruits the brachialis (the muscle under the biceps) more than either pull-up or chin-up.
For most lifters: program pull-ups for back width, chin-ups for biceps and total volume, and neutral grip as a joint-friendly accessory. Rotating between all three keeps the joints fresh and develops the back evenly.
Pull-up: Step-by-Step Form (Overhand Grip)

The pull-up targets the latissimus dorsi, teres major, lower trapezius, rhomboids, biceps brachii, and brachialis. It is the most efficient single exercise for back width and overall pulling strength.
Step 1 — Grip and Setup
Grip the bar with an overhand (pronated) grip, hands roughly shoulder-width or slightly wider apart. Wrap your thumbs around the bar fully — a thumbless "false grip" reduces forearm activation but compromises grip safety. Hang from the bar with arms fully extended (the dead hang position), shoulders pulled down and back into their sockets — not shrugged up to your ears. Engage your lats by imagining you are squeezing oranges in your armpits.
Step 2 — Pull (Concentric)
Drive your elbows down and slightly back toward your hips. Lead with your chest — imagine bringing your chest up to the bar, not your chin. The bar should travel toward your upper chest, not your forehead. At the top, your chin should be clearly above the bar and your upper chest should be close to it. Squeeze your shoulder blades together at the top. In my experience coaching new lifters, the biggest tell that someone is pulling correctly is that their chest, not their chin, leads the movement.
Step 3 — Lower Under Control (Eccentric)
Lower yourself with a 2-3 second descent. Do not drop or "fall" out of the top position — the controlled lower is where most of the back growth happens. Return to a full dead hang at the bottom, with arms completely straight, before initiating the next rep. Half-reps that never reach full extension cheat both the lats and your tendon health.
Step 4 — Body Position and Breathing
Keep your body in a hollow body position throughout — ribs down, abs braced, legs straight or crossed at the ankles, slightly in front of you. This kills any leg-swing momentum (kipping). Inhale at the bottom dead hang, hold the breath through the pull, exhale at the top. Re-breathe and re-brace before each rep. Strict pull-ups are slower than kipping but they build the back, not the cardio system.
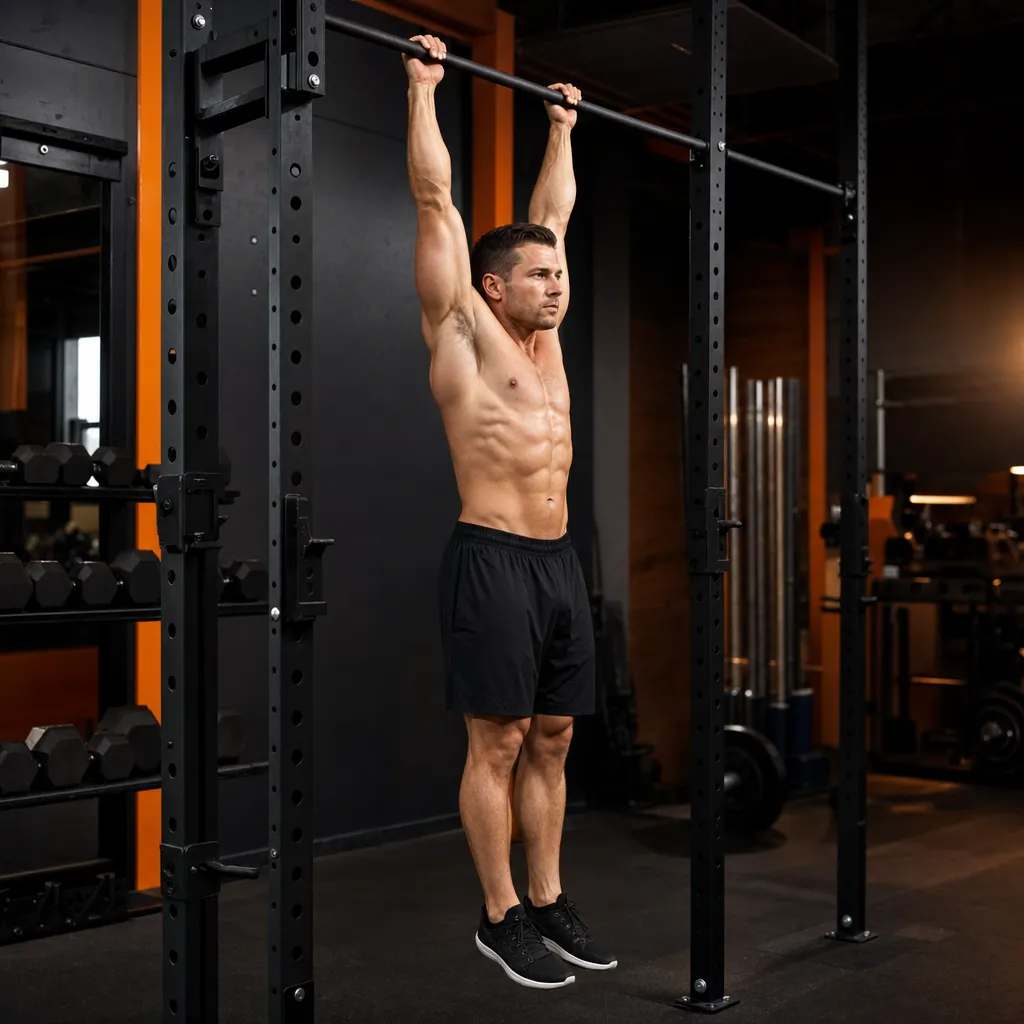
Pull-up bottom dead hang position with arms fully extended and lats engaged
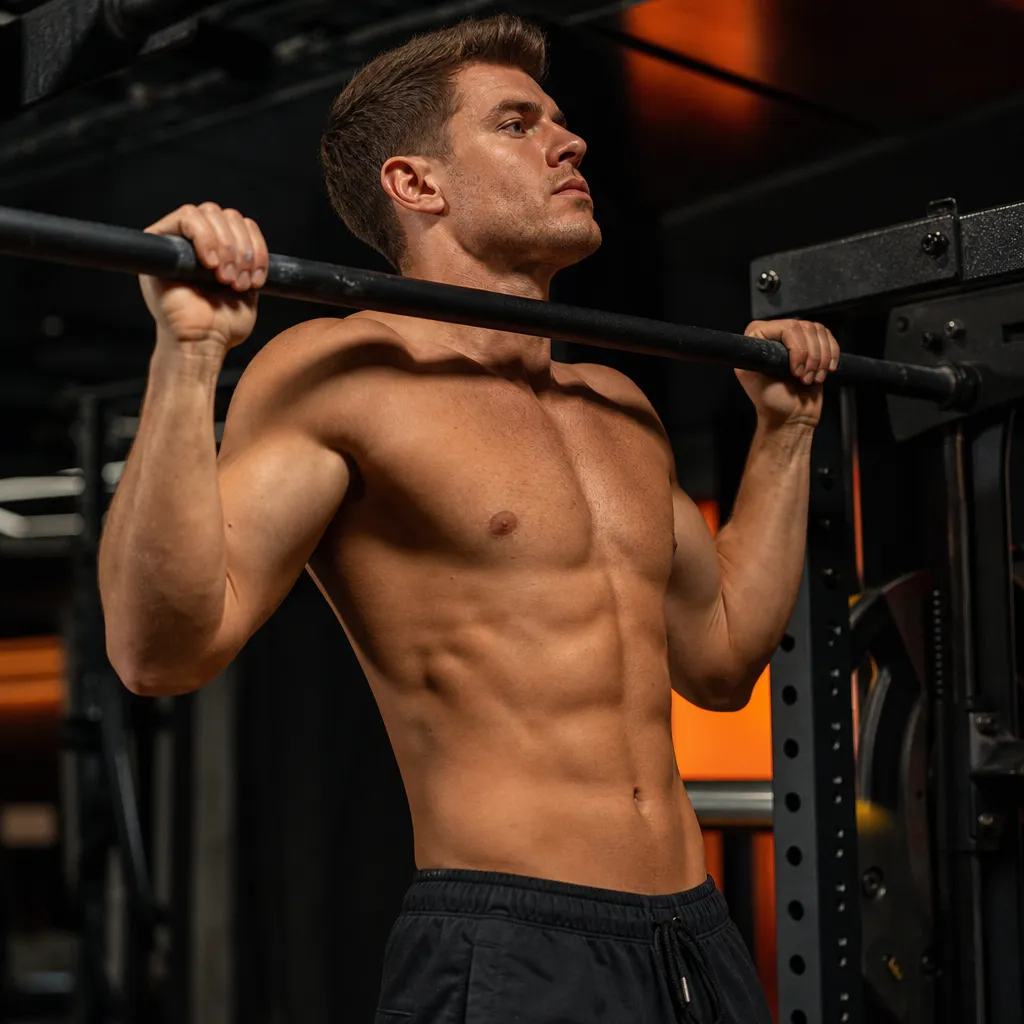
Pull-up top position with chin over the bar and shoulder blades retracted
Chin-up: Step-by-Step Form (Underhand Grip)

The chin-up targets the biceps brachii and brachialis along with the latissimus dorsi, lower trapezius, and rhomboids. The underhand grip changes the leverage so the biceps can contribute at near-maximum force, making this the single best mass-building exercise for the biceps — yes, more effective than barbell curls.
Step 1 — Grip and Setup
Grip the bar with an underhand (supinated) grip, hands roughly shoulder-width apart. Narrower than shoulder-width is fine and many lifters prefer it for biceps emphasis. Wrap your thumbs fully. Dead hang with arms straight and shoulders packed (pulled down into their sockets). The setup is otherwise identical to the pull-up.
Step 2 — Pull (Concentric)
Pull yourself up by driving your elbows down and forward. Because of the supinated grip, your elbows naturally come closer to your sides than in a pull-up — this is correct. Aim to get your chin over the bar with your chest close to the bar. Feel the squeeze in both the lats and the biceps simultaneously at the top. The chin-up tends to feel "easier" than the pull-up because the biceps actively assist.
Step 3 — Lower Under Control (Eccentric)
Lower yourself with a 2-3 second descent back to a full dead hang. Like the pull-up, full extension at the bottom is non-negotiable for back development and elbow health. Avoid letting your shoulders shrug up to your ears at the bottom — keep them packed.
Step 4 — Programming Note
Because chin-ups recruit the biceps so aggressively, they can be programmed as your primary biceps movement on a pull day. Three sets of 6-10 chin-ups will hit the biceps harder than three sets of curls. If you are training back and biceps together, do chin-ups first when fresh; their strength carryover to direct biceps work is significant.

Chin-up bottom dead hang position with underhand grip and arms fully extended

Chin-up top position with chin over bar and biceps fully engaged
Can't Do a Pull-up Yet? Negative Pull-up Progression

If you cannot do a single pull-up yet, you are in good company — most untrained adults cannot. The good news: the eccentric (lowering) phase of a pull-up is where you build the strength to perform a full rep. Negatives target the same muscles with about 1.6× the force production of the concentric phase, so they build pull-up strength faster than any other method.
Step 1 — Get to the Top
Use a box, bench, or jump to position your chin above the bar. Both arms should be bent, with your chest close to the bar — the same end position as a completed pull-up. This is your starting point.
Step 2 — Lower as Slowly as Possible
Resist gravity all the way down. Aim for a 5-second descent on your first negatives, working up to 8-10 seconds as you build strength. Engage your lats — imagine pulling the bar apart even as you lower. Reach a complete dead hang with arms fully extended before stepping back up.
Step 3 — Rest and Repeat
Step back up and repeat. Negatives are demanding; you will fatigue quickly. Three sets of 3-5 negatives, twice per week, is the standard starting prescription. As you get stronger, increase the descent time before adding reps.
Step 4 — Combine With Other Methods
The fastest path to your first pull-up combines negatives with two assistance methods: (1) Banded pull-ups, with a thick resistance band looped over the bar and under one foot, give you an "assisted concentric"; (2) Lat pulldowns at 70-80% of bodyweight build the same muscle pattern under load. A typical week: Monday — 3×5 negatives + 3×8 banded pull-ups; Thursday — 3×5 negatives + 4×8 lat pulldowns. Most lifters earn their first full bodyweight pull-up within 6-8 weeks on this combination.
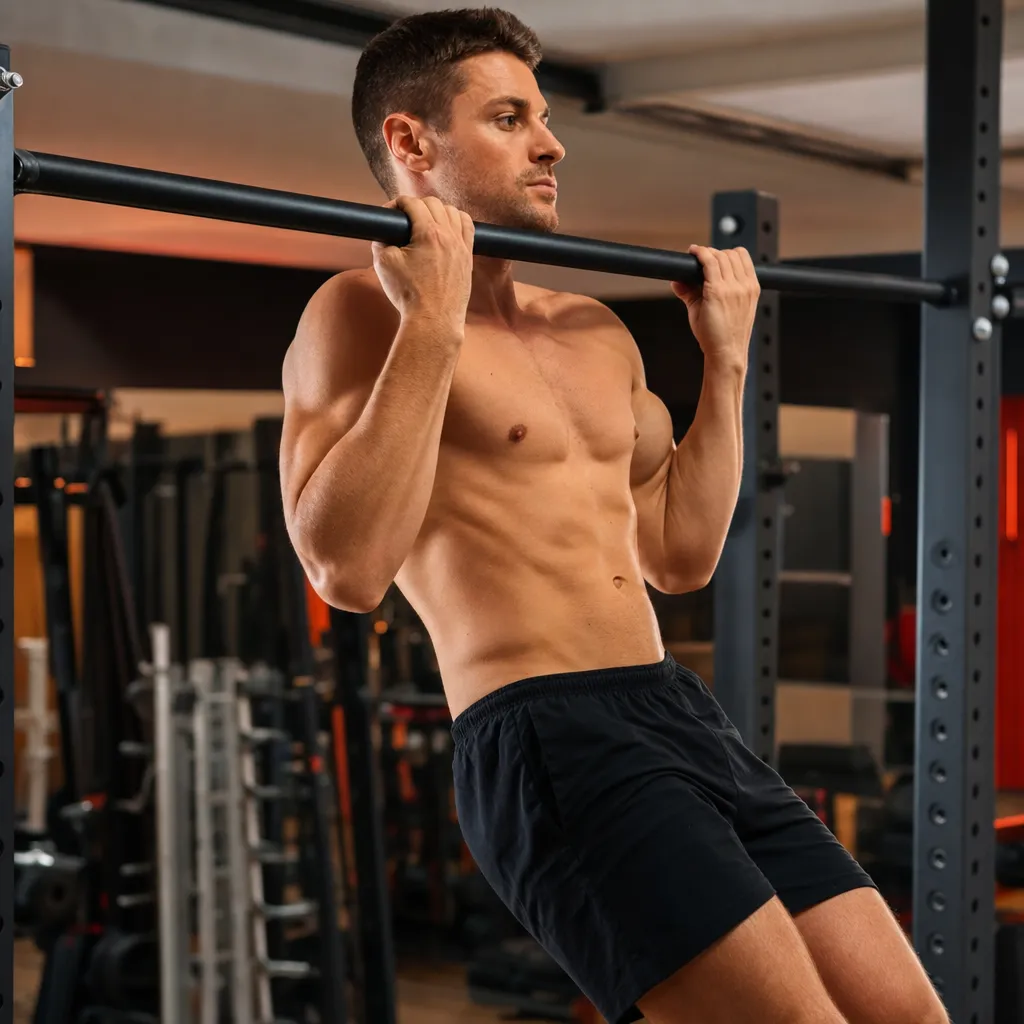
Negative pull-up start position, athlete jumped to chin-over-bar

Negative pull-up controlled lower phase, slowly descending to dead hang
What Are the Most Common Pull-up Bar Mistakes
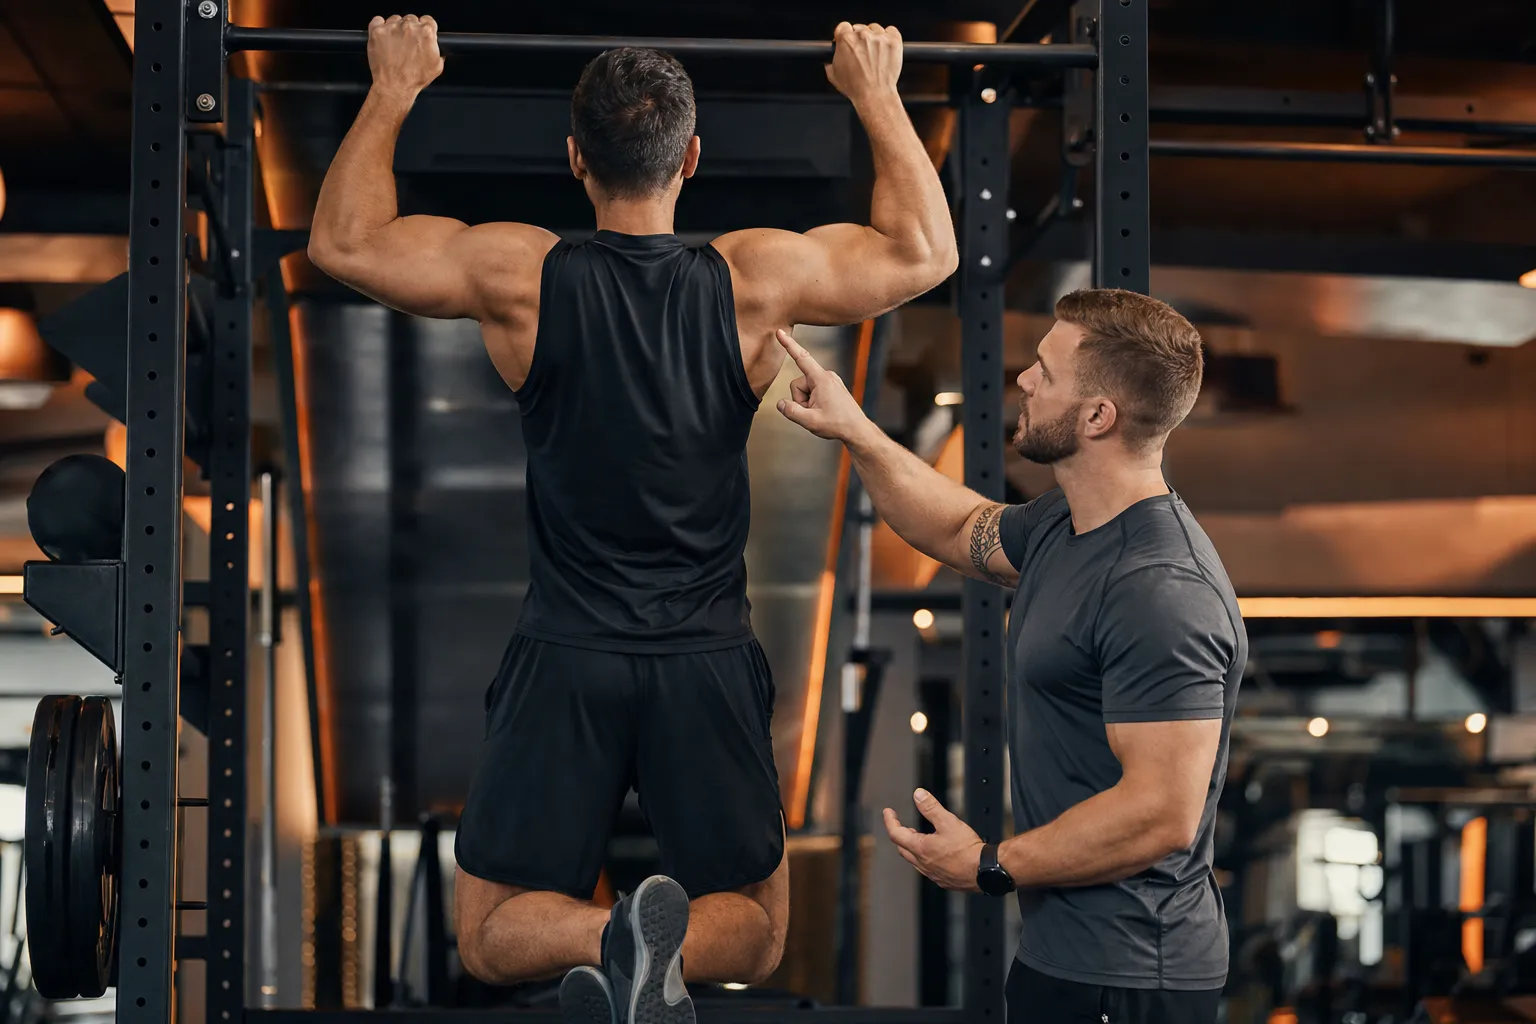
Fix these errors and your pull-up numbers — and back development — will jump quickly.
Kipping (using leg swing for momentum). Swinging your legs forward and back to generate upward momentum cheats the lats and turns a strength exercise into a CrossFit-style metabolic hit. For pure back building, kill all leg swing — keep the body in a strict hollow position. Kipping is a different exercise with different goals; do not confuse it with strict pull-ups.
Partial range of motion at the top. Stopping with your eyes at bar level instead of your chin clearly above robs you of the peak contraction where the lats are most engaged. The standard is chin clearly over the bar with your upper chest pulled toward the bar. If you cannot reach that depth, reduce the number of reps and prioritize quality.
Partial range of motion at the bottom. Many lifters pump out reps without ever reaching a full dead hang. Half-reps build half the back. Every rep starts and ends with arms fully extended and lats engaged at the bottom.
Shrugging shoulders to the ears at the bottom. When you hang fully extended, do not let the shoulders ride up to your ears. Pack them — pull them down and slightly back into their sockets. This protects the rotator cuff and keeps tension on the lats. The cue: "long arms, packed shoulders."
Pulling the chin to the bar instead of the chest. If your chin is the part of you racing to the bar, you are leading with the neck and using the upper traps too much. Lead with the chest — imagine bringing your sternum to the bar. The chin clears the bar as a byproduct, not as the goal.
What Are the Key Takeaways
| Point | Recommendation |
|---|---|
| Why pull-up bar for back | Full bodyweight vertical pull = unmatched back-width builder |
| Pull-up vs chin-up | Overhand = lat-dominant; underhand = bicep-and-lat dominant, ~15-20% easier |
| Setup | Pack shoulders, hollow body, full dead hang at the bottom |
| Concentric cue | Lead with the chest, drive elbows down toward hips |
| Eccentric | 2-3 second controlled lower, full extension at the bottom |
| Beginner path | 5-second negatives + banded pull-ups + lat pulldowns, 2x/week |
Quick mistake checklist:
- Kipping for momentum — kill leg swing, hollow body
- Stopping with eyes at bar — chin must clearly clear
- No dead hang at the bottom — full extension every rep
- Shrugged shoulders at the hang — pack them down and back
- Leading with chin instead of chest — sternum to the bar
Recommended pull-up bar back day: Pull-ups 4×6-10 + Chin-ups 3×8 + Negative pull-ups (slow descent, weighted if you can do 10+ regular reps) 3×3 + Hanging leg raise 3×12. For lifters who cannot yet do a full pull-up, swap pull-ups for 3×5 banded pull-ups and 3×5 negatives. For machine-based variations on the same muscle group, see our cable back workout guide; for free-weight pulling, see the barbell back workout.
Frequently Asked Questions
What is the difference between a pull-up and a chin-up?
The grip. A pull-up uses an overhand (pronated) grip with palms facing away — this puts the latissimus dorsi in the most mechanically advantageous position. A chin-up uses an underhand (supinated) grip with palms facing you, which shifts more work to the biceps and is generally easier for beginners. Both train the back, but chin-ups feel about 15-20% easier for most lifters.
What muscles do pull-ups work?
Pull-ups primarily target the latissimus dorsi (lats), with significant work from the trapezius, rhomboids, teres major, biceps brachii, brachialis, and rear deltoids. The core also works isometrically to prevent leg swing. A 2014 EMG analysis in the Journal of Strength and Conditioning Research showed wide-grip pull-ups produced the highest lat activation, while close-grip chin-ups produced the highest biceps activation.
How do I do my first pull-up if I can't do one yet?
Use the negative pull-up progression. Step or jump to the top position with your chin over the bar, then lower yourself down as slowly as possible — aim for 5 seconds on the way down. Start with 3 sets of 3-5 negatives twice per week. Most beginners earn their first full pull-up within 6-8 weeks of consistent negative training, often combined with assisted pull-ups (band or machine) for additional volume.
Are wide grip pull-ups better than neutral grip for the back?
Wide grip emphasizes the upper lats and teres major and creates the visual back-width that defines a V-taper. Neutral grip (palms facing each other) is easier on the shoulders and elbows and recruits more of the lower lats and brachialis. Neither is universally "better" — wide grip for visual width, neutral grip for joint-friendly volume. A complete program rotates between them.
How many pull-ups should I be able to do?
Standards vary by bodyweight and training age, but rough benchmarks for a healthy adult male: 1 rep = beginner, 5 reps = average, 10 reps = good, 15+ reps = strong, 20+ reps = excellent. For women, the same numbers shift down by about 30-40% due to upper-body strength differences. Bodyweight matters significantly — a 90 kg lifter doing 10 pull-ups is performing more total work than a 65 kg lifter doing 15.
References & Sources
1RM Calculator (One-Rep Max)
Estimate your one-rep max (1RM) - the maximum weight you can lift for a single repetition - from a weight you can lift for multiple reps. The calculator uses the Epley and Brzycki equations and averages them.
Strength Standards Calculator
How strong are you compared to other lifters? Enter your bodyweight and best lift to see where you rank - from Beginner to Elite - on the bench press, squat, deadlift, and overhead press. Standards are scaled to your bodyweight, so a 60 kg lifter and a 100 kg lifter are judged fairly.
Protein Intake Calculator
Calculate how much protein you need each day based on your body weight and training goal. This calculator uses the research-backed range of 1.6 to 2.2 grams of protein per kilogram of body weight for building muscle.