How to Do Lunges: Form, Variations & Benefits
Why Lunges Are the Key to Single-Leg Strength
Walk, run, climb stairs, kick a ball — almost every movement you do in daily life happens on one leg at a time. The lunge is the gym's direct answer to that reality. Unlike the squat, which loads both legs symmetrically, the lunge forces each side to handle its own bodyweight, expose its own weaknesses, and stabilize its own balance. That is why coaches call it a true unilateral exercise.
A 2018 study published in the Journal of Strength and Conditioning Research compared muscle activation across the squat and several lunge variations. The researchers found that the reverse lunge produced significantly higher gluteus medius activity than the back squat — meaning the small hip stabilizer that prevents your knee from caving inward gets trained far more aggressively when you stand on one leg.
Muscles Worked
The lunge is deceptively complete. While it looks like a leg exercise, it recruits stabilizers all the way up the chain:
- Primary movers: Quadriceps of the front leg (extend the knee on the way up), gluteus maximus (drives hip extension), hamstrings (assist hip extension and control the descent)
- Critical stabilizers: Gluteus medius (keeps the pelvis level so it does not drop on the unsupported side), adductors (prevent the front knee from caving inward), transverse abdominis (anti-rotation core bracing)
- Postural support: Erector spinae, calves (gastrocnemius/soleus), tibialis anterior — together they fight every small wobble your standing leg encounters
The takeaway: if you can squat clean reps but lunges expose shaking, sideways drift, or a knee that wants to cave, that gap is a real-world weakness — and lunges are how you close it. For the bilateral foundation, read our squat article first.
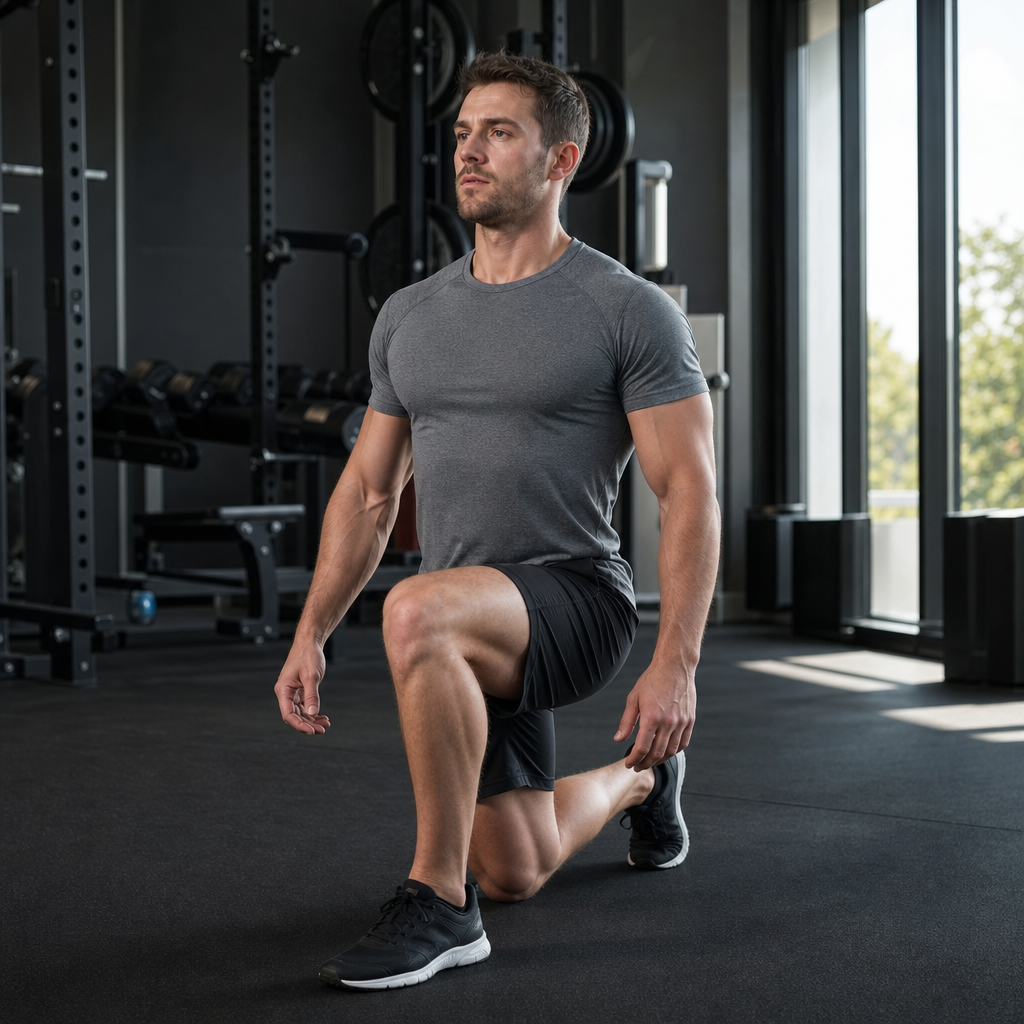
How to Do a Bodyweight Lunge with Proper Form
The bodyweight lunge has fewer pieces than a squat but is less forgiving — a short stride or a tipped torso shows up in your knees within a few sets. Here is the exact sequence I teach beginners:
Step 1 — Set your stance: Stand tall with feet hip-width apart, hands on your hips or by your sides. Take a long step forward — roughly one and a half times the length of your normal walking stride. You should feel a small stretch across the front of your back hip in this position. Most people start with a stride that is too short, which is the single biggest reason lunges hurt knees.
Step 2 — Brace and align: Tighten your core as if expecting a punch. Pull your shoulders down and back, keep your chest up, and look straight ahead. Both feet should point forward; do not let the back foot rotate outward.
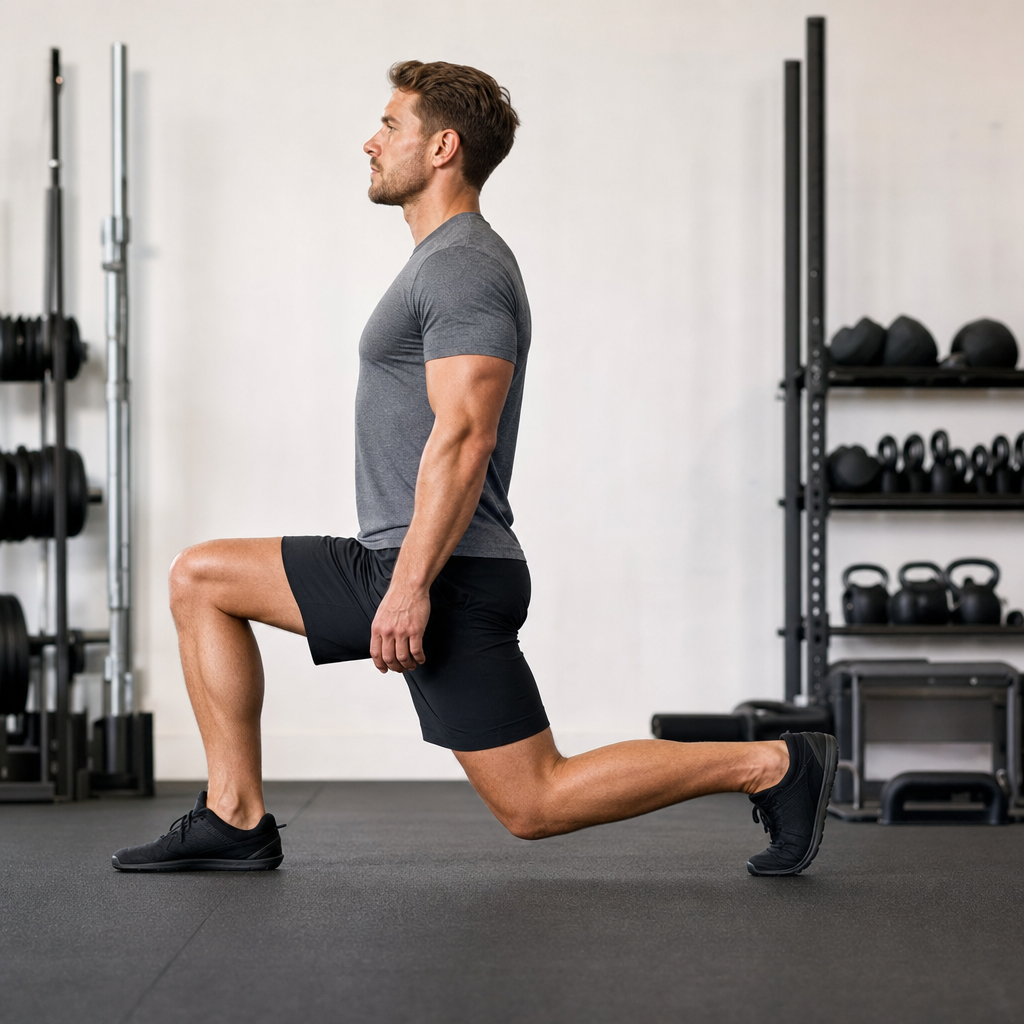
Step 3 — Descend straight down: Bend both knees at the same time and lower your body straight down — not forward. The goal is for your front thigh to reach parallel with the floor while your back knee hovers about one inch (2–3 cm) above the ground. Your front shin should remain roughly vertical; the back knee should be directly under or slightly behind your back hip.
Step 4 — Drive back up: Push through the whole front foot — heel through midfoot — and squeeze the front glute to stand back up. Keep the torso upright through the entire rep. Exhale on the way up. If you tip forward during the lift, your front glute is not engaging — slow down and re-brace before the next rep.
Tempo I use with clients: 2 seconds down, a brief pause at the bottom (no bouncing off the back knee), 1 second up. Do not bang the back knee into the floor; the soft hover trains real control and protects the patella.
What Lunge Variations Should You Try?

The basic lunge is one move, but the lunge family is huge. Each direction of travel — forward, backward, lateral, walking, rotational — emphasizes a slightly different mix of muscles and balance demands.
| Variation | Difficulty | Main Focus | Who It's For |
|---|---|---|---|
| Stationary (split) lunge | Beginner | Quad + form control | Learning the pattern without balance challenge |
| Reverse lunge | Beginner | Glutes + hamstrings, knee-friendly | Anyone with sensitive knees |
| Forward lunge | Intermediate | Quad + deceleration strength | Athletes, runners |
| Walking lunge | Intermediate | Dynamic balance + conditioning | Building unilateral endurance |
| Curtsy lunge | Intermediate | Glute medius + adductors | Targeting outer hip and inner thigh |
| Lateral lunge | Intermediate | Adductors + frontal-plane stability | Athletes who cut, change direction |
Progression strategy: Start with stationary lunges so you can master front-shin angle and torso position without worrying about balance. Once you can do 3 sets of 10 clean stationary reps per leg, move to reverse lunges (knee-friendly) and then to forward and walking lunges. Lateral and curtsy variations are wonderful additions once you own the sagittal-plane (front-to-back) pattern.
In my experience, the reverse lunge is the most under-used. People skip straight from squats to walking lunges and end up with cranky knees in a week. The reverse lunge gives you 80% of the strength benefit with about 30% of the joint stress — start there, earn the right to step forward.
What Are the Most Common Lunge Mistakes?
Lunges look simple, which is exactly why they tend to be done poorly. Here are the five errors I correct most often, in roughly the order they show up:
1. Front knee caving inward: The knee drifts toward the midline of your body instead of tracking over the second/third toe. This loads the medial knee structures (MCL, meniscus) and is a direct path to pain. Fix: actively push the front knee outward on every rep, as if trying to spread the floor with your foot. If it still caves, your glute medius is weak — add side-lying clams and band lateral walks twice a week.
2. Stride too short: Most beginners step forward only about as far as a normal walking stride. The result: the front knee shoots well past the toe, and stress lands directly on the patellar tendon. Fix: lengthen the stance until the back knee can drop straight down with the front shin nearly vertical. If you cannot tell, take a photo from the side — front shin and back thigh should both be close to vertical at the bottom.
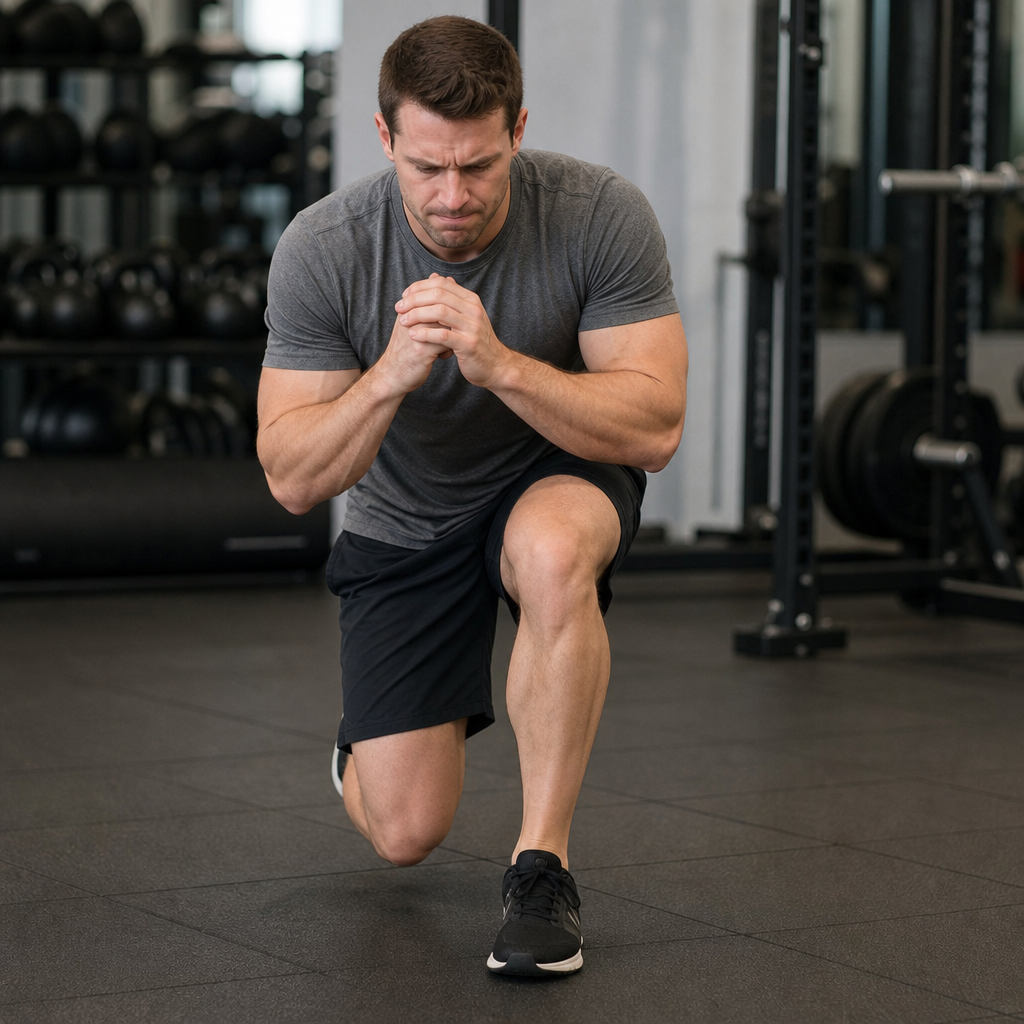
3. Torso leaning forward: When the chest dives toward the front thigh, the load transfers from the front glute onto the quadriceps and lower back. Fix: brace the core harder before each rep, lift the breastbone, and imagine balancing a glass of water on your sternum. If your torso still tips, your front glute is not strong enough yet — drop reps and rebuild quality.
4. Losing balance, drifting sideways: The standing leg wobbles, the hip drops on the back-leg side, and your body sways. This is a glute medius and core problem. Fix: stand with your standing foot fully planted — toes spread inside the shoe — and brace the core before you descend. Holding onto a wall lightly with one hand while you learn the pattern is fine; remove the assistance after a session or two.
5. Front knee shooting past the toe: Some forward knee travel is normal and safe in healthy knees, but a knee that drives 10+ cm past the toe almost always means the stride is too short or the torso is too upright. Fix: lengthen the stride first; if the knee still shoots forward, slow the eccentric to 3 seconds so you cannot let the knee dive uncontrolled.
What Are the Key Takeaways?
| Point | Recommendation |
|---|---|
| Primary muscles | Front-leg quad, glute max, hamstrings — glute medius and core stabilize |
| Stance | Long stride (1.5x walking step), both feet pointing forward |
| Depth | Front thigh parallel, back knee hovers 2–3 cm above floor |
| Front shin | Stays roughly vertical — lengthen the stride if knee shoots forward |
| Progression | Stationary → Reverse → Forward → Walking → Lateral / Curtsy |
Quick checklist — fix these before your next set:
- Stride long enough for the back knee to drop straight down
- Front knee tracking over second toe — no inward caving
- Torso vertical, chest up, core braced
- Back knee hovers — no banging into the floor
- Drive up through the whole front foot, squeeze the glute at the top
Next steps: If you are brand new to lunges, start with 3 sets of 8 reverse lunges per leg, twice per week. After two weeks add a third weekly session and progress to walking lunges. Once 3 sets of 12 walking lunges per leg feels easy, it is time to add load — pick up a pair of dumbbells and follow our dumbbell leg exercises for the next progression. For the bilateral foundation that complements lunge work, revisit the squat article.
Frequently Asked Questions
What muscles do lunges work?
Lunges primarily target the quadriceps of the front leg, the gluteus maximus and hamstrings for hip extension, and the smaller hip stabilizers (glute medius, adductors) that keep your pelvis level. Because each leg works independently, lunges recruit more stabilizing musculature than bilateral squats — your core, calves, and even tibialis anterior all contribute to keeping you balanced.
Are lunges better than squats?
Neither is strictly better — they serve different purposes. Squats let you load both legs together for maximum strength and quad mass. Lunges expose and correct left–right imbalances, build single-leg stability, and have a lower spinal compression cost. Most people benefit from doing both: squats early in the workout for heavy bilateral work, lunges later for unilateral correction and conditioning.
Why do my knees hurt when I do lunges?
The most common cause is a stride that is too short, which forces the front knee far past the toe and pushes shear stress into the patellar tendon. Lengthen your stance until the back knee can drop straight down and the front shin stays roughly vertical. Other culprits are knees caving inward (weak glute medius), letting the back knee crash into the floor, and a torso that tips forward and shifts load onto the kneecap.
How many lunges should I do?
For general strength and balance, 3 sets of 8–12 reps per leg, 2–3 times per week is a solid target. Walking lunges fatigue you faster than stationary lunges — start with 2 sets of 10 steps per leg and add volume gradually. Form breaks down quickly with high-rep lunges, so stop the set once your knees start drifting inward or your stride starts shortening.
What is the difference between a forward and reverse lunge?
In a forward lunge you step forward and decelerate against gravity — this is harder on the front knee and demands more balance. In a reverse lunge you step backward, which keeps your front shin more vertical and shifts emphasis toward the glutes and hamstrings. Reverse lunges are usually the smarter starting point for beginners and anyone with cranky knees; forward and walking lunges add dynamic balance once your base is solid.